f The Bugbytes

Welcome - Copyright & Disclaimer

We are moving from custom domain back to blogspot. If there are broken links please try adding blogspot.com instead of .com. Welcome to The Bug Bytes - a blog mainly for Papercrafting and some photography and other stuff thrown in here & there. Add in some die cutting machine, scrapbooking tools, cameras, scissors , glue and...... My name is Pam. If you have been redirected from papillondigitaldesign.blogspot.com you have come to the right place.Hope you get inspired by the projects, videos and files. Would love it if you could leave comments and become a follower. (Word verification is turned ON to avoid spam. Sorry for that inconvenience.) Would love it if you would also share your project here . If you find a linky under the post do share your project by posting link there or if you do not find a linky post your link in the comments.Thank you for visiting.

September 12, 2011

Waterfall Card

My hubby's Birthday is this week so I decided to do a waterfall card. I used my favorite Dover images for this. I printed and cut  using silhouette but since there is no intricate edges and all straight edges you can use just your scissors or straight edge cutter and stamps to make this card and a scorer would be nice. I also decided to use twine as the pull  for PaperCraftWeekendChallenge this week was to use twine.
Here's the dimensions if you want to do it with scissors


You will find after you glue the 4  (almost) square pieces that the last fold folds the strip into half .
In that folded position glue the long inner strip and punch a small hole to tie the tassel (here I have used twine) Glue just the strip - edge of the 1st waterfall piece almost square piece - end to the brad piece at the center. Attach the brads to the cards inner mat and tuck the tassel end under the strip so that it can be pulled and gives the waterfall effect
The base svg, knk and silhouette file are uploaded and can be found under the main tab

Here's the card I made


The waterfall effect


I made another version of the same where I folded the card so the inside of the card. I just twined the twine (ha ha did your tongue twine? Mine did) around the ribbon


Hope you enjoyed reading and seeing the project. I love reading your comments and for those who took time to leave them Thank You - I appreciate it very much.

post signature

Butterfly Tag Card


Hi ~ Lori here from ScrappinMyStressAway with a tag card I made for my sister-in-law for her birthday.  I am excited to be at TheBugBytes today!  Pam ispired me to blend my ink but my project ended up different than I originally planned!  Most of them do for me!!


I started out with a basic tag shape from Tags, Bags, Boxes and More. I used the mirror function sized at 5.20w x 4.00h. I cut out the tag at 2.46w x 3.65h and hid the slit on the top with Hide Contour. I cut out 2 sets so I can make 2 cards at a time.


Here are the cards cut out.


I grabbed this this butterfly from Hannah Montana sized at 2.45w x 1.47h.  I cut out three just in case the first one did not turn out!  These were cut in Canson watercolor paper that I got at Michaels.


My intent was to use my watercolor colored pencils that I have had forever (from Stampin' Up) but guess what.....I couldn't find them!!  If only I had a full-time assistant/personal organizer....

I kept on going knowing that a better idea would come!


I used my Martha Stewart Edge punch on the tag and tied a skinny yellow ribbon on.  I adhered it to my card with my ATG gun.


I used my home made Glimmer Mist to ink my butterflies.  To see how I make my Glimmer Mist go HERE.


After the butterfly dried, I put some purple gems (from the dollar bin at Michaels) on it to bling it up!!


I put a JoysLife All Around Sentiment stamp inside.

And here is my little cute card once again!  Thank you Pam for having me over to play today!!!

September 11, 2011

Please Call-card

Hi, all, Carole from On my craft room wall here with my first post for The BugBytes. Thanks so much, Pam, for inviting me to be part of this very wonderful and talented Design Team.
Today marks the 10th anniversary of the terrorist attack of September 11th , 2001. I had a very hard time deciding how I wanted my project to tie in to this anniversary. I didn't feel I could do an adequate tribute project, but wanted to do something to acknowledge the events of that day. When I think back to that day I have so many pictures and sounds etched into my memory of the events that occurred. Some of these I witnessed on tv, some are of how the people around me reacted to the horrific events as they unfolded, and some of the saddest for me personally are how my children reacted to what had taken place.
I remember that many of the people caught in the towers and on the airplanes involved in the attacks made last phone calls to their loved ones to say good bye. How sad to hear these calls. This is what I decided to use as my inspiration for this project. My message is to please call a loved one today. Just to say "Hi" and let them know you love them.


Supplies and card elements:
Phone cut at 3.8" from Imagine Better Together cartridge
Background cardstock printed from Imagine Best Friends cartridge
Paper lace made using Martha Stewart Doily Lace Edge punch and Ivory Stampin Up cardstock

"Please call" from Cursive 101, welded on my Gypsy, at .75" in Ivory Stampin Up cardstock
Card measures approximately 5.5 X 5.5 including paper lace edging
Other supplies: Martha Stewart adhesive backed pearls, Sakura sparkly Gelly roll pens-Blue Star and Silver Star, Ranger Distress Ink-Black Soot and Vintage Photo, Dazzles heart sticker, Pop dots (lots!)

I used my blue Gelly roll pen to add sparkly dots to the cardstock  pattern so it would better match the telephone. The phone is two "combined image" layers, pop dotted, with an additional handle layer and number dial layer (also pop dotted) added. I placed pink MS pearls on the number dial where the numbers would typically go, and an ivory MS pearl in the center. I used my silver Gelly roll pen to highlight the phone cord. All phone pieces and cardstock edges were distressed. A silver holographic Dazzles heart sticker was added to the phone base.


Paper lace: I would love to share how I did  this since I'm quite happy with how it turned out. I wanted the lace edging to go completely around the card, but I couldn't get the edges to look good at the corners, plus it was so flat looking. I wanted a real lace look. So I punched (4) 6 to 7 inch strips with the MS punch and glued them together to make one very long piece of  "lace". Finished sized was approximately 24-26 inches long. Then I fan folded and pinched the lace strip, working in small pieces, to give it a bit of flexibility and dimension. I glued it to the underside edge of my card front, pleating and folding it as I went around each corner. I pretty much mimicked the process for how I would glue real lace to the card. When I got it completely around the card, I cut the excess and glued the end in a pleasing fashion. I have a feeling many of the cards I create over the next few months will incorporate this technique.


Thanks for looking!
Now, don't you have a phone call to make?

September 9, 2011

Experiments

Hi all,
I thought I'd share some experiments with you today with my gold leaf and the zig way glue pen.

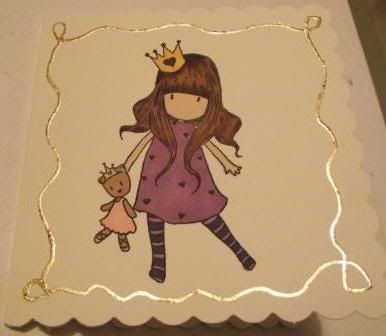
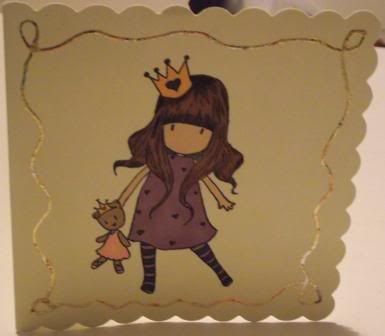
First I stamped my image straight onto my card. I was trying to do a quick simple card.


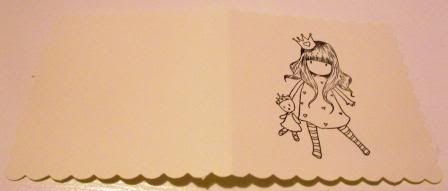
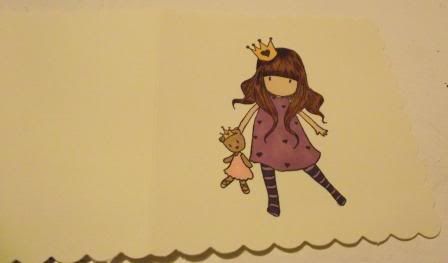
I coloured the image in using my Promarkers. I know the ink bled through to the back of the card, but that'll be covered with a quick insert.


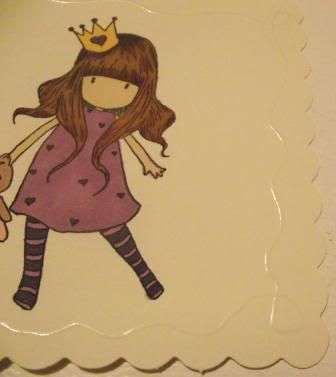
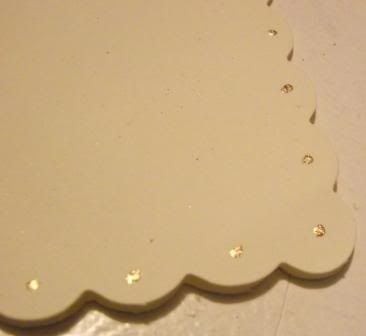
Then I decorated around the image using my zig way glue pen. I then had to leave the glue to change colour. This would make it tacky enough to hold the gold leaf.


Here's another way of using the pen outting dots around the edge.


Here it is with the gold leaf on. It gives a subtle shine/decoration to the card.


As you can see it just helps the image to stand out. I'm going to have a play making vines and different designs to go around the edge of a card. Hopefully this will give you the courage to experiment. Thank you to Pam for having me as a guest designer today.


I will be posting my blog candy on Saturday.


Kelly x


September 7, 2011

A Flowered Box

Hi Everyone!  It’s Wini from LooneyBugDesigns with your a project for you today.
I made this super quick and easy box for you today and decorated it with an adorable Lilly I made using some McGill punches.  My oldest daughter's current favorite color is Orange and she is in need of some storage for her growing bead collection – so I thought I would surprise her with a cute little storage box.
Lilly Box
For all the details on this fun little project please visit my Blog. This box took me about 15 minutes to make start to finish so it will be no problem when she wants a different one in a week a two because she has decided she hates orange (any of you pre-teen moms know what I am talking about here).  I hope you find a few minutes to craft today – it really doesn’t have to take long to make a cute gift for someone.
Hugs, Wini

Gypsy video - Sizing envelopes in Cricut Gypsy

It's been ages since I did a video or touched the Gypsy. So please do bear with me while watching this video as I am sure I have fumbled and jumbled and .. .
This was request - to show how to size envelopes in the Gypsy. I have tried showing both cases when you use the proportionate card size already there in cartridge and when you want to use a different proportion card than that provided i.e when you unlink the golden chain :) .


One Cut, Two Cards

Hello Everyone, it's Ohhh Snap from Ohhh Snap and today is my day to be the guest designer at The Bug Bytes :D. I love using PaperLayerz by Megan Elizabeth with my Cricut (it cuts like or butter!). I made these two cards with one cut. The first one is the "offical" cut (the snowflake using the silhouette feature on the Damask Decor cartridge).


The second cart is made from what was left on the mat, framed by a mat made from what was left on the paper. Stickles were used on both :D. And the card bases are made from Stampers Select White cardstock from Papertrey Ink.

There are nine 4 inch squares on one side of PaperLayerz and a full sheet of a complementary color on the other. This is one of my favorites, All Stressed Out.

But if you have an E2, the best way to line the cuts up with the colors is to use the Gypsy. I made a 4 inch grid on the first layer (which is visible all the time) and then hide all the other layers so there is no confusion about what cut is going where. It is a good idea though to triple check the paper and the Gypsy are facing the same direction.

After the cuts are made, carefully lift the paper off the mat and set it aside, it still has use, which I'll show you in a minute. The cuts I'm working with today are the Silhouette Feature on Damask Decor. These are cut at less than 4 inches. I forgot to change my cutting blade, but they still turned out pretty well.

The silhouette cut is on the right, on the left is what was left over after the silhouette cut was carefully removed (sometimes it helps to use a paper piercer to make sure small pieces stay on the Cricut mat. I cut a mat from what was left on the paper and put it on the Cricut mat.

I took a piece of co-ordinating paper and cut it about the size of the mat, then I put glue on the paper left on the Cricut mat and set the co-ordinating paper face down on top of the glue. Wait a little while and then carefully remove everything from the Cricut mat. You want to have an idea of the backing papers before you start cutting because you don't want to leave the "leftovers" on the Cricut mat too long (the mat adhesive starts to stick more).

Here are all 6 cuts and their leftovers made useful, and all at under 4 inches each :D. Two cards down, ten to go lol.


September 6, 2011

Easy Halloween Cards

Good morning! Sheila here from She's A Sassy Lady and once again I get the privilege to visit you all here at The Bug Bytes with my friend Pam. Isn't this just too cute!!! I love the bright colors and look Kristy (Craftin' On My Door) I even used tulle just like you suggested!!! I needed to make some quick cards for my grand children for Halloween so I made this quick and easy Z card. Note I made the cards at work on my break! Don't you love it? 
I decided I am not going to be like last year and rushing and not getting all the things I need to do for the holiday so I am using the KISS system..... keep it simple Sassy! 

First I took a basic 8 1/2x11 and cut it up the middle so that I would have a 4 1/4x11 inches. Then I folded it in half and brought up the left side on itself again at the half way point as shown. Score all folds and the card will look like a backwards Z.


I purchased this wonderful card stock stack by My Paper Studio at Hobby Lobby during their half off paper sale. The papers are just yummy and are 8 1/2 x11... just perfect for making cards.


The stack had this great page with 1 1/2 inch square designs on it so I just cut what I needed by hand for the center of my card.

I then took 1 sheet of patterned paper and cut 2 pieces at 4x5.25 inches and 3 pieces at 2.50x4 inches.

Then I adhered to the front and back of the card leaving the section on the inside for a sentiment to be stamped and for signatures.

I then cut out one of the squares from the tag sheet in the stack and some striped paper just about 1/4 inch larger. I also cut out some of the sparkly tulle (thanks to Kristie's reminder to use tulle. She is from from Crafting On My Door).

It really add bling to a plain and simple card doesn't it? love all the sparkle in the tulle.

Then I placed Zip Dry glue on half and adhered it to the front of my card. So, so easy!

Now wasn't that easy? Anyone can make these cards with just a few sheets of colored paper. I like that I can make them on my break at work because there is no equipment just ATG gun, paper, scissors and tulle.

 Here are all ten cards lined up. They worked out great all I had to do was stamp the sentiment on the inside of the card and sign with a white gel pen, it was just so easy.

 Click on photos if you would like to see a close up of the card.
Yup, just as cute as can be and in less than 5 minutes you have a card. I made ten in one hour! ANYONE can make these and they would even be great to make with your children.
Hope you liked today's little project. Thanks for your sweet - sweet words. Your comments continue to inspire me. Have a BLESSED day.
Sheila