f The Bugbytes

Welcome - Copyright & Disclaimer

We are moving from custom domain back to blogspot. If there are broken links please try adding blogspot.com instead of .com. Welcome to The Bug Bytes - a blog mainly for Papercrafting and some photography and other stuff thrown in here & there. Add in some die cutting machine, scrapbooking tools, cameras, scissors , glue and...... My name is Pam. If you have been redirected from papillondigitaldesign.blogspot.com you have come to the right place.Hope you get inspired by the projects, videos and files. Would love it if you could leave comments and become a follower. (Word verification is turned ON to avoid spam. Sorry for that inconvenience.) Would love it if you would also share your project here . If you find a linky under the post do share your project by posting link there or if you do not find a linky post your link in the comments.Thank you for visiting.

November 17, 2010

Light Up Christmas Frame!

This is Nadia from With Glittering Eyes blog to share a holiday project with you!


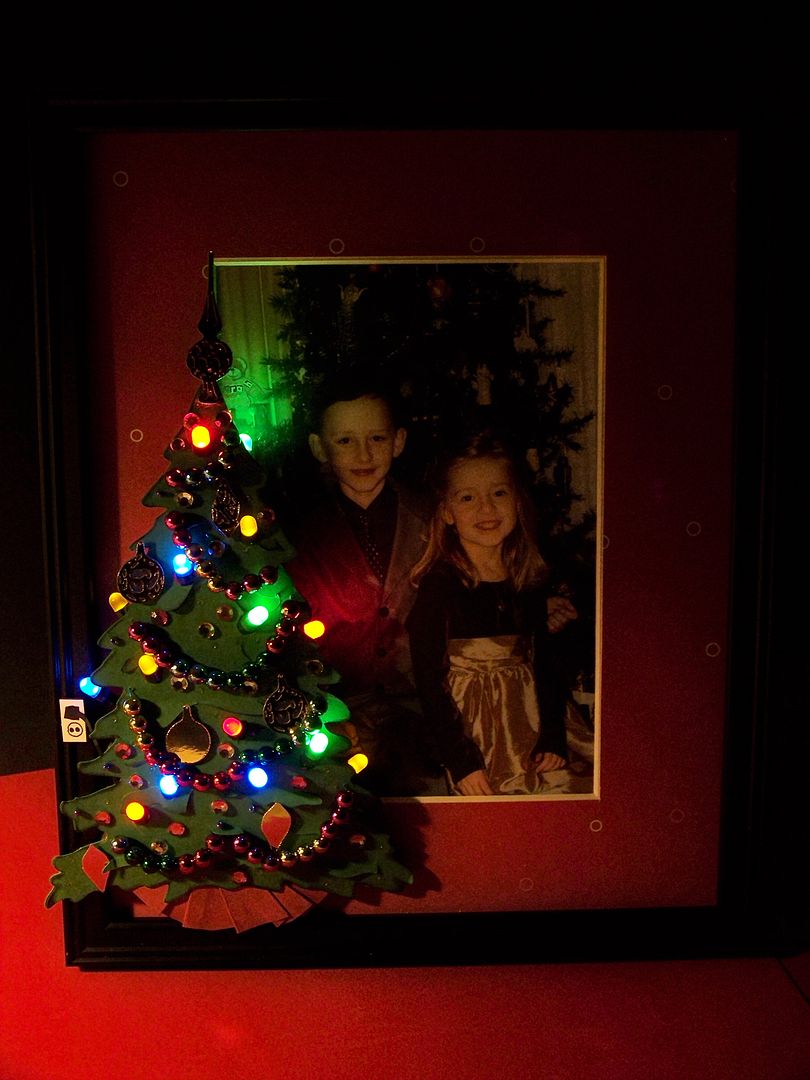
I created a light up photo frame for Christmas.  The idea of adding lights came a bit late in the project -- sometimes projects change while being crafted in my little world!
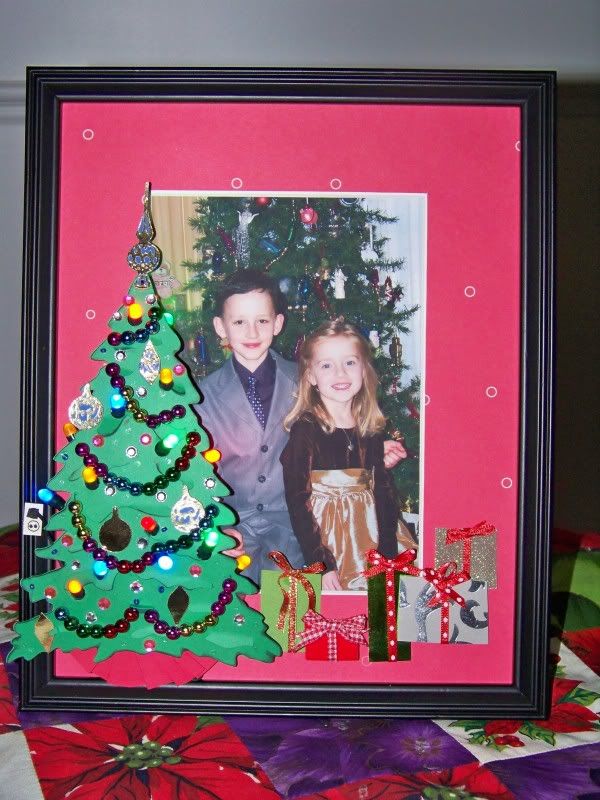


I started this project without the idea of adding lights.  I used the tree from Christmas (Solutions cart).  I cut two trees at 6-1/2" so I could put them together and lift up the branches on the top tree.  


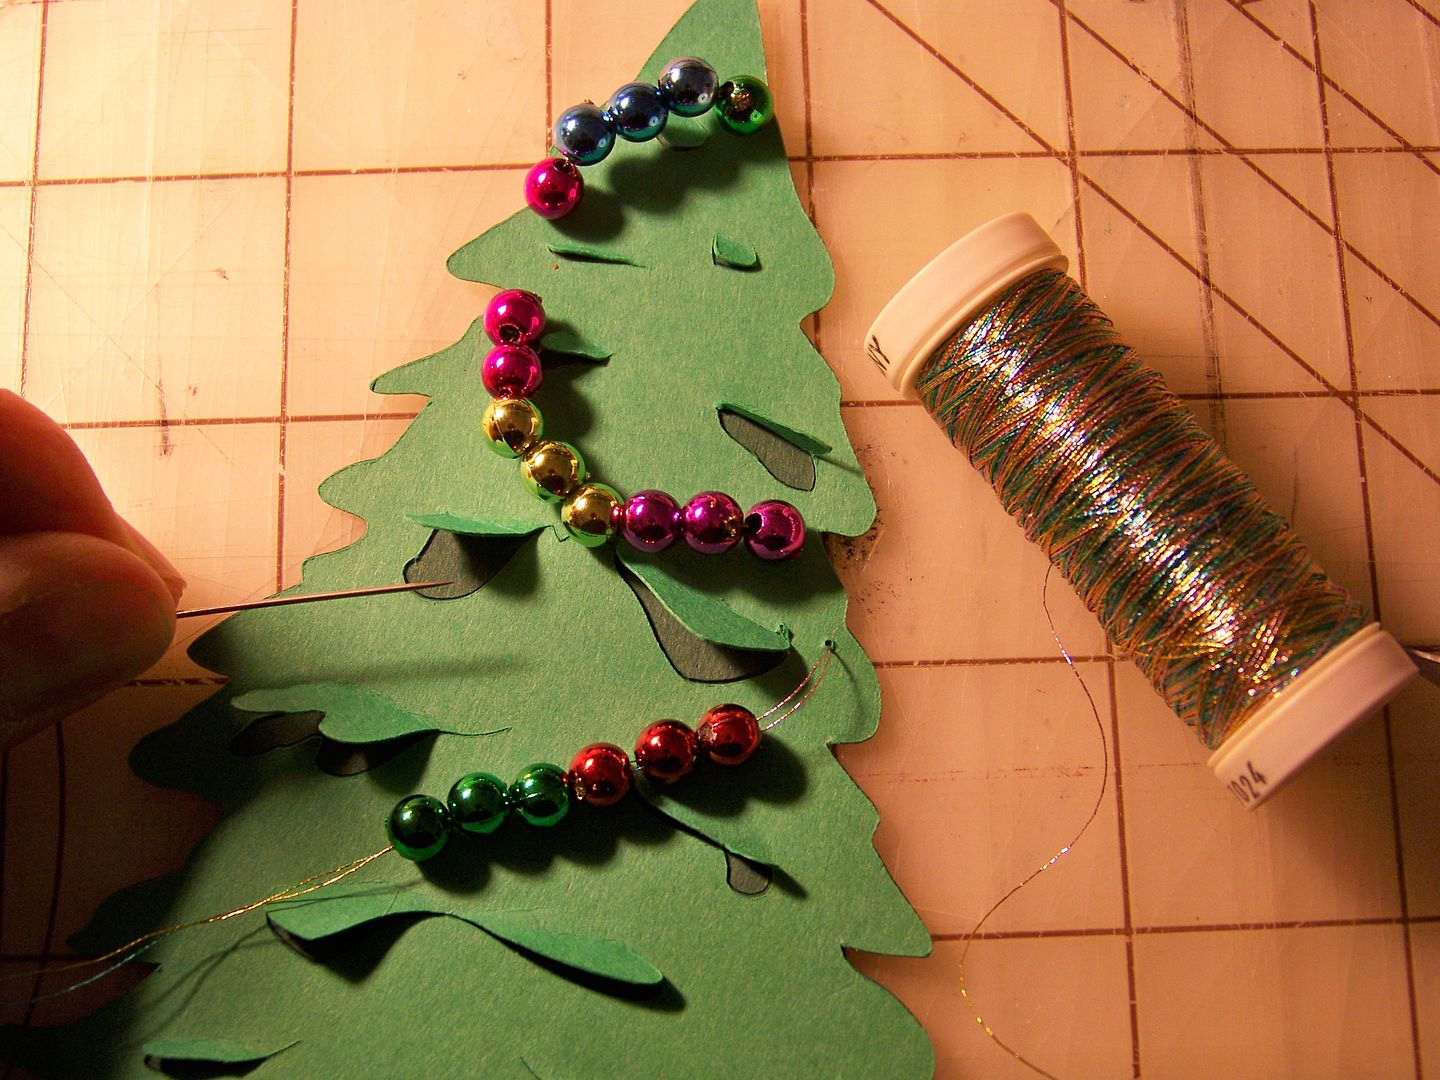
I created a garland by stitching on lines of beads with metallic thread.  Unlike gluing, stitching a long line of beads will allow them to hang, like real garland!


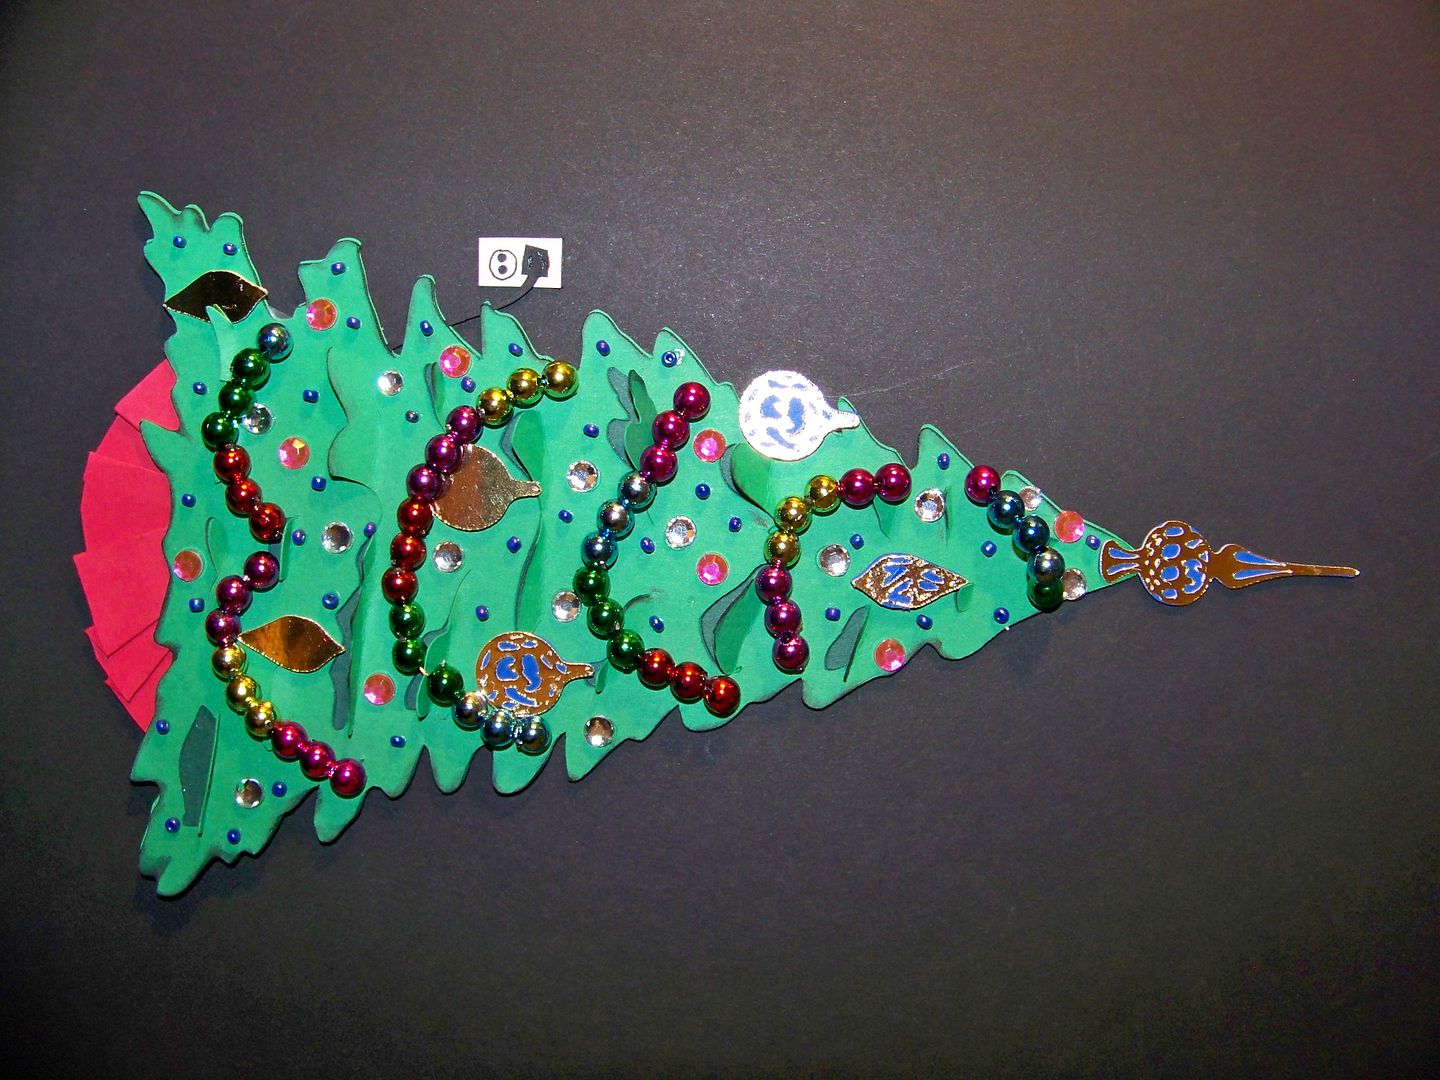
For fun, and to remind me of the silliness of our family, I added a paper electrical cord and outlet.  Keeping the electrical cord visible and clear was the subject of repeated lectures growing up as my sweet, paranoid mom dealt with the real tree that she always bought, despite her fear of it catching on fire. 

I decorated the tree with jewels, beads, and ornaments (cut at 3/4") and a topper (cut at 1-3/4") from the same Christmas cart.  I added a tree skirt that I hand-cut and folded.
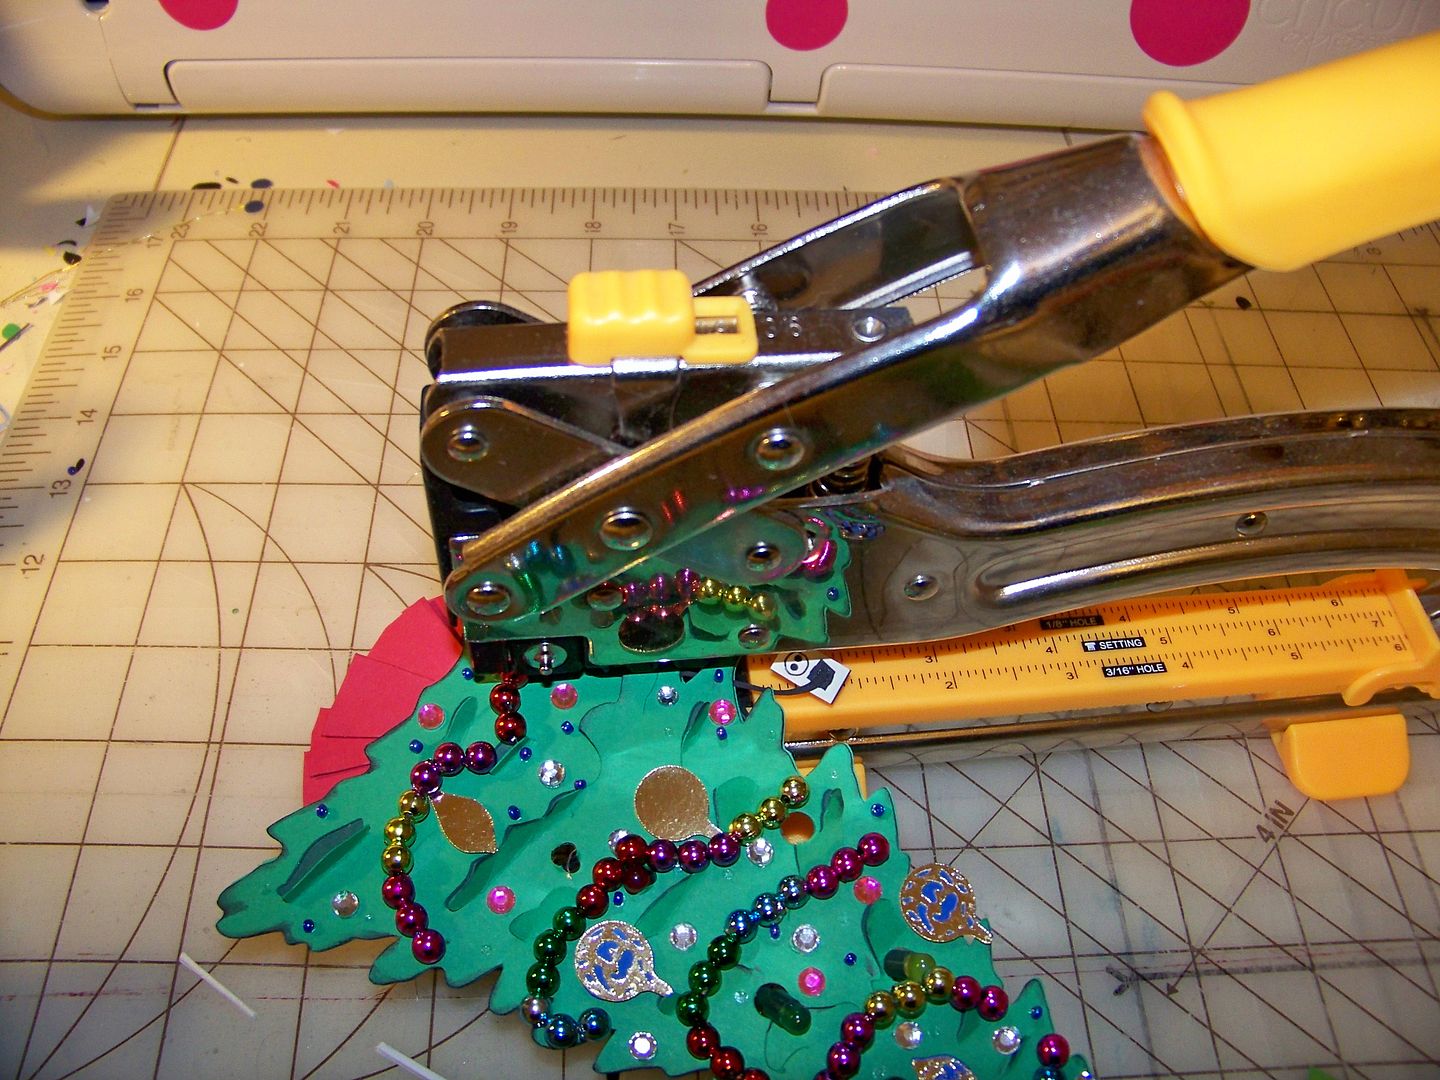
...And then, an epiphany!  Why not add lights to make the tree really light up and play off the joke of the paper plug and outlet?!  I used a hole punch and Crop-A-Dile Big Bite (for the holes in the center of the tree), a task which would have been much easier before the tree was decorated! 


To assemble the project, I removed the glass from the inexpensive frame I purchased.  I cut a paper mat that I glued to the purchased frame's white mat with double-sided tape, while still allowing the beveled edges to show.  I printed off a copy of the picture I had chosen for this project and attached it from behind the mat with double-sided photo tape.  Using a mat knife, I cut a triangle out all the way through the picture and back so that I could feed the cords through from the back to the tree that will be on the front.


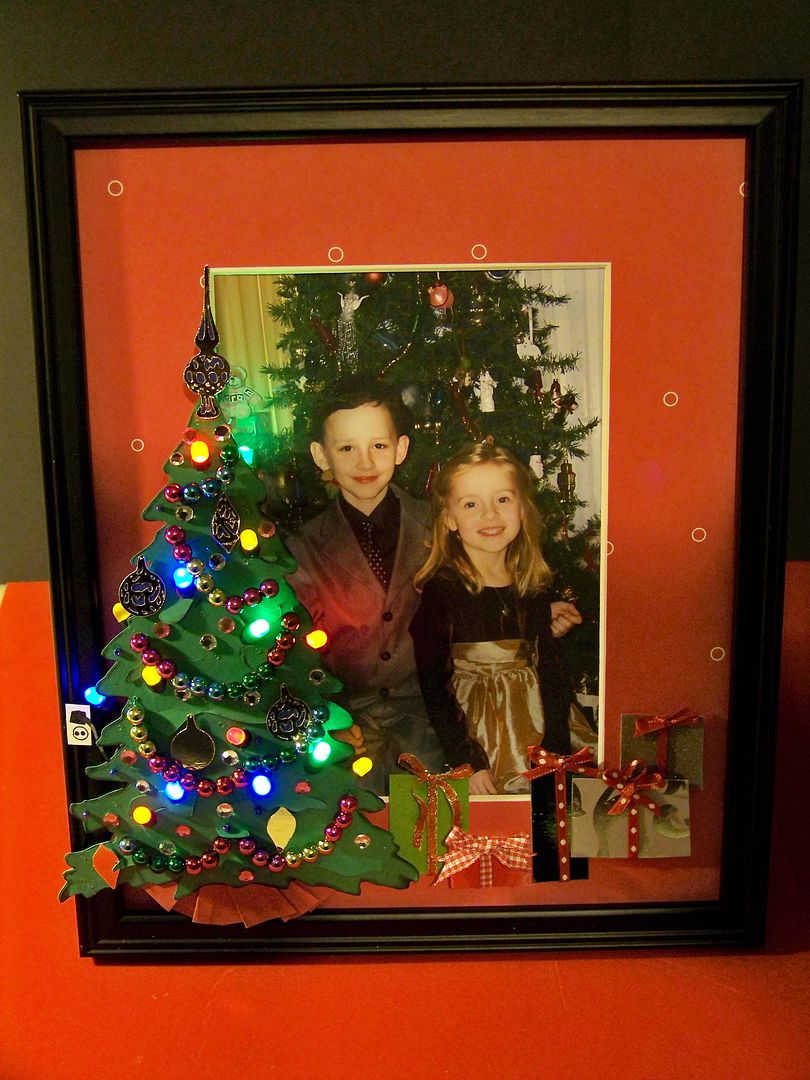
I applied the lights to the tree, keeping the cords on the back of it as flat as possible with tape.  I applied the tree with pop dots on the top and sides, attaching to the mat.  I glued the tree skirt flush, attaching to the wood frame.  A bit of glue was used to attach the paper electrical outlet to the frame as well.
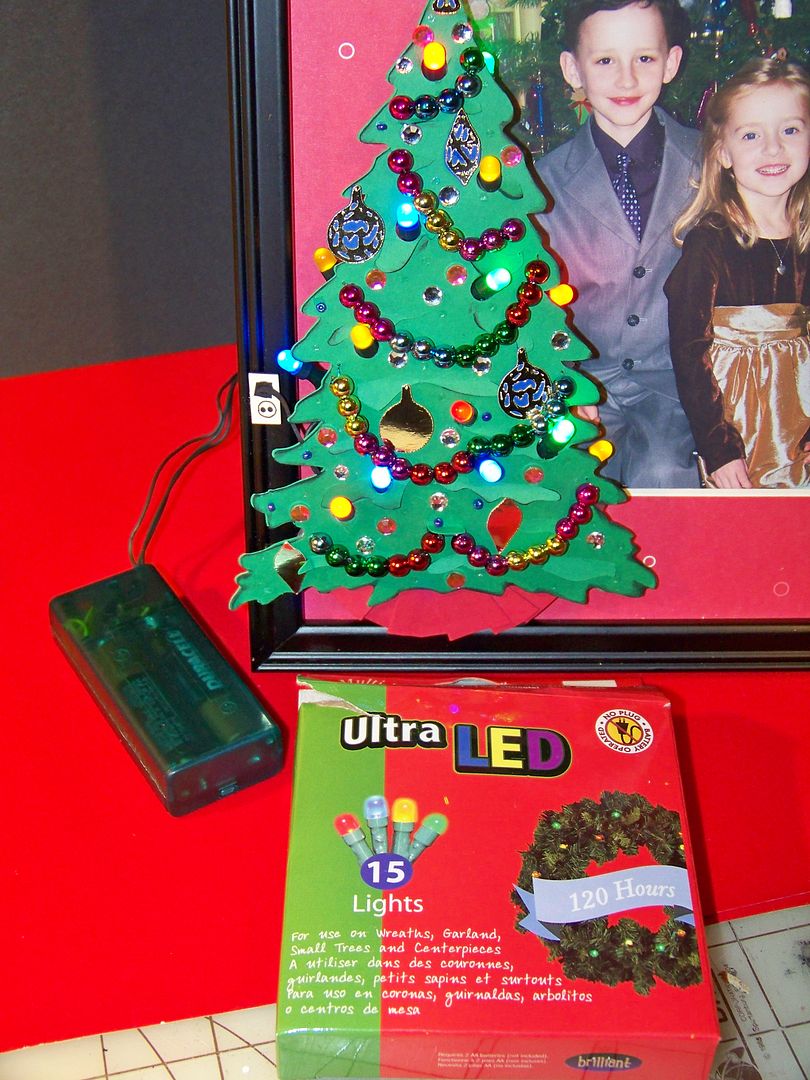

These are the lights I used.  I found them at Meijer for less than $4.

I had to test it... like a kid,  I just wanted to see it glow in the darkness!

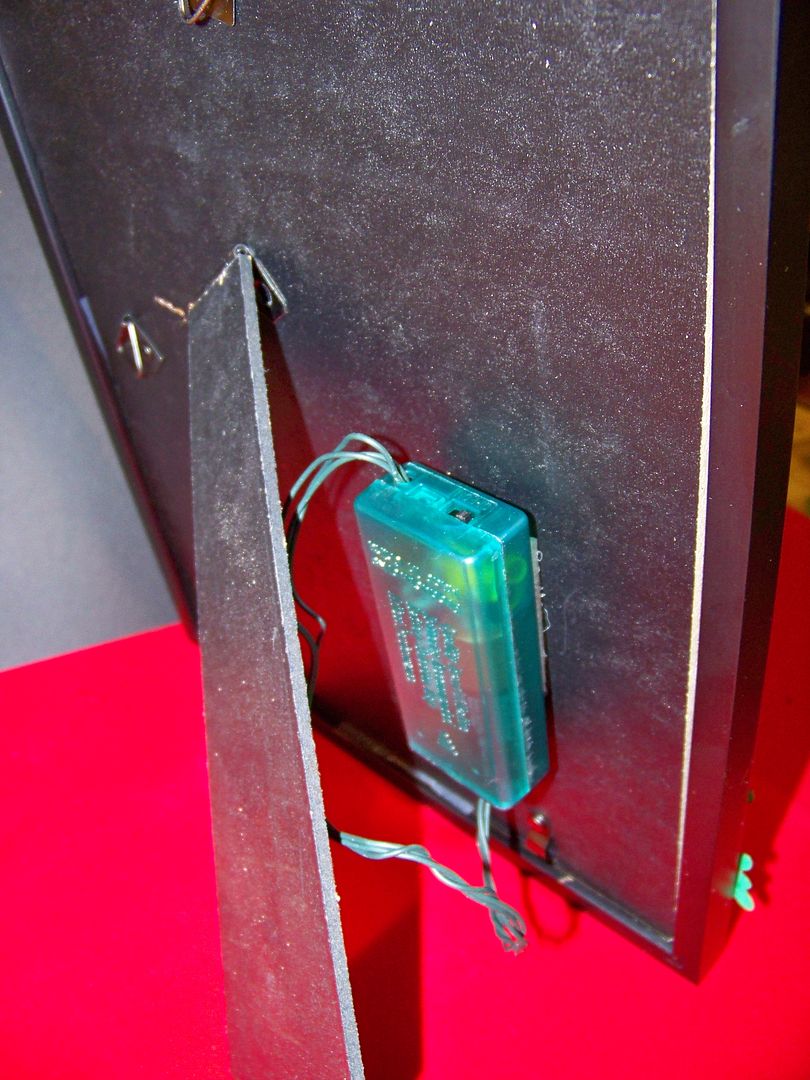
I used Velcro to attach the battery unit to the back of the frame.

I added a few gifts that were simply rectangles, embellished with ribbon and bows I tied.  Some are popped up with pop dots to add a little dimension.

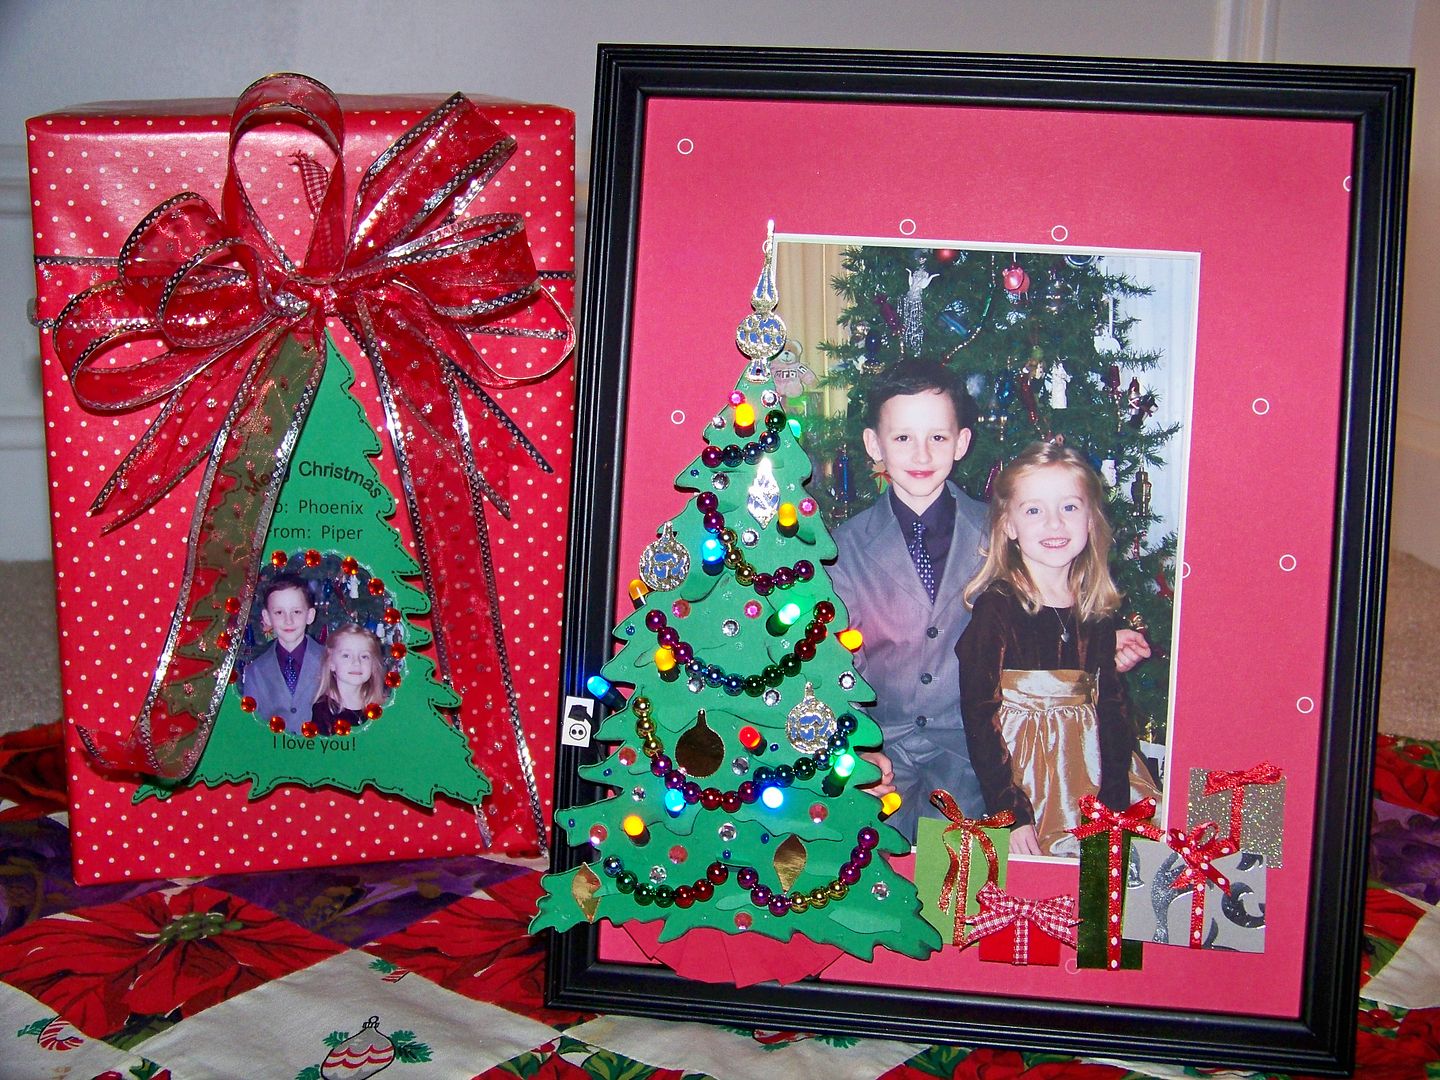
I hope you like my frame!  To carry on the theme, I created a tag using the same tree and photo, printing the tag on my computer, and cutting a window using Mini Monograms at 2-1/4" using the Centerpoint feature.

Thank you for looking at my project.  You are invited to visit my blog to see my other projects and past posts!

November 16, 2010

"My guy" dinosaur page


Happy Tuesday! This is Beatriz from Amazing Grace. I made this layout for a friend of mine who has the cutest son ever! I used Paper Dolls Cricut Cartridge.


 I cut out the dinosaurs on page 34 size 8" and 9". The volcano is free hand and the dinosaur paper is from Hobby Lobby.


Hope this inspires you to make some "wild" pages! Thank you Pam for having me once again! Have a fabulous and blessed day!

November 15, 2010

Long time!

Hmm. Long time since I posted anything in this blog. I have been busy! watching videos of various classes. Yep a long list of catching up to do. So it will be a while till I create something! Meanwhile I did make one change- I decided to change the logo a bit. I still wanted the logo to represent my butterflies ie my papillon babies and so like their tags but the name was almost lost within so changed it to go around instead of inside the papillon figure.
Also well to show that this is a scrapbooking site and not about dogs (lol) I added a small scrapbooking album. Yeah! I am beginning to love illustrator!!


post signature

November 14, 2010

Mac users and cut files to CDS files

Interesting thing I found ut in the MB today
Unlike PC users, mac users do not have to use cds in order to convert cds files to g files.
Here are what 2 MB Mac users say . You have to check on the validity of this as I am not a Mac user

Fayrai and Kut-n-Print posted where mac users CAN convert .txt (older extension for .cut files) and I am assuming that it works for .cut files as well!

Fayrai

I had downloaded the file to my desktop and I right clicked to reveal a number of options for opening the file. The only option that proved successful was Opera( whatever that is) I opted to save the file and deleted the .txt and downloaded this to my desktop. I opened my G. sync, dragged the new file (sans .txt) and wa-la. It converted the file and I downloaded it to my G.


Kut-n-Print


It's even easier than that. Click on the file and click command-I for Get Info and then change the extension in the name and extension box. A dialog will pop up to confirm that is what you wanted to do. Click on use/keep .gypsy.

November 13, 2010

JINGLE BELLS-JINGLE BELLS


Hello crafters friends, followers and visitors.
My name is Agnes and you know me as flowerdisco from 

Come and visit anytime. I am always making "this n' that" but mostly cards I like to share with you since nobody else here at home cares, lol.

I am one of Pam's Gyptian's designer and today is my turn to share a project with you.

I am in the "easy tag making stage" right now, :) 
We all know the holidays are very close and WE, the ones that procrastinate a lot, HEHEHE, don't have a lot of time to be making very detailed cards/projects these days. At least not me, ;)

BUT, In my efforts to be ahead of the game this year, I decided to start making my holiday tags for some special friends and family. I am also thinking to make two small garlands from this cut and use them for the two doorways that lead to my kitchen and dining room.
I used the Christmas Noel Solutions cartridge for this project and I believe this cartridge is retired but I am not 100% sure of it.

I introduce to you  now my beautiful

Jingle Bells Tag
cut at 3.5 inches high
This cut is number 12 in the cartridge.
You can click on the photo for a bigger view.

I used all the features, including shadows, blackouts, shift and non-shift ones but only two different papers.

The red patterned designer paper is from My Mind's Eye and its thickness is more like cardstock and it already has all the bling you need for this tag.

 The cardstock I used for the blackout and shadow features is a thicker cardstock from the Martha Stewart brand I bought a while ago on sale.

 I inked both sides: front and back.

 I used foam tape on most of the layers for the dimensional effect I always try to incorporate in my projects.

 The button is a vintage button I inherited.

As you can see, it was a really fun cut that became in a pretty and easy tag, and it will beautifully compliment some of those special gifts for some special family and friends.
I made another tag for my Thanksgiving hostess and you can see it here. I hope you enjoyed them both and maybe they help you with your handmade holiday projects.

Happy Thanksgiving to all and I do not know if I will be back here at Pam aka The Bug Bytes before next year so I wish you a very Happy and Merry Christmas!!! too.
Love you and my best wishes to you all.

Thanks Pami for having me over once more. I sincerely appreciate your kindness.


NOTE: No Gypsy screen photos since all I did was cut and nothing really fancy. I know you will be glad I did not add more photos to this post, lol.

November 12, 2010

Chinese takeout boxes a la Gypsy

Hi everyone, this is Beth from thunderbirdlindybydesign today is my day to be a guest designer on The Bug Bytes.  I wanted to share with you some Chinese take out boxes I created on my Gypsy using Opposites Attract and George Basic Shapes.  I had a major problem finding a trapezoid on the Gypsy that was symetrical.  I finally came up with one on Opposites attract, but even that one was kind of off kilter, but I went with it anyway.  This file is not perfect, but it turned out ok for what I wanted.  I had messed with the file numerous times before I scrapped the whole thing(no pun intened) and started over.  At that point I was running out of time so I went with what I had.

The first picture is on the file itself, sans Christmas tree cut, I added that later.  If you look closely, you can tell the image is not perfectly symetrical.


At this point I thought it would be cute with a window in it, so I added the Christmas tree from one of the Christmas carts.


I did not add score lines to the file itself, but did them by hand afterwards.  Did I mention this cut is not symetrical, and because of this, I just had to eyeball the score lines..

I tried to make sure I scored from the bottom corner of the box to where the top folded down 3.25" on all 4 sides so when the box went together, the top edges were even.

 I took 12" of 2 different colored ribbon and some heavy weight thread and a needle and with a gathering stitch sewed the 2 ribbons together by hand and gathered them to form a rosette.  Since I was only doing one, I didn't get out the sewing machine.

I really love these rosettes, they are so easy, and add so much to a project.

I had 3 prototypes before I settled on the last design but I thought I would decorate and throw them in to the post also.  They don't look bad, especially after being decorated up. 

Here is a pic of all of my boxes, they would look great with 25 cut out and used a count down to Christmas Calendar maybe strung on a string in front of a window..  The first 3 are the prototypes(can you tell my husband is an engineer?)  The last one with the tree is the final one.


Close ups, I added a piece of Cricut Cart Plastic to the inside of the tree cut so my goodies would not fall out.  I have purchased so many carts, I don't think I will every run out of plastic.


Well thanks for having me today.  If you are interested in the cut file, email me (rwhite58@maplenetbroadband.com) and I will post on my blog.  I didn't want to just put it out there with it not being perfect.

Until next time, keep crafting, Beth.

Jessica Art of Digital Design Blog Hop

My fellow students at Jessica Sprague have a fantastic treat for you all and are giving some beautiful digital kits away. Yep !It's a Blog Hop! available until Nov 14th and nope unfortunately I did not take part.  Be sure to gather all the candies :) and leave them some love.
Here is the beginning link - www.sweetsunshinephotography.blogspot.com
And also check out both Jessica Sprague (she also has some free classes ) and Renee Pearson for some fabulous classes on digital Design

November 10, 2010

Ice Cream Cone

Cold has not quite yet set in so there is still time to enjoy some cones ain't it?
Atleast these cones! can be had all through the seasons
Now! I had to play and test those Imagine cartridges didn't I? I did slowly climb up. Imagine is so nice for quick card. This is a test run .My son  has his birthday coming up soon - day after thanksgiving in fact so I am going to do a similar onebut  in green or blue for him.
Now almost everything was going well when I tried to use corner punches and it got caught and almost mangled the card!! So I improvised and cut out the corners.Too big a round for my zutter so had to use scissors.
The stickles is still wet and will only dry by late night or tomorrow.
Cartridge used is Imagine Yummy.pattern all cut from that.So easy to match the palette. And the lace is also paper pattern from Imagine - bonus section.
I also added some plastic beads which looked like sprinkles which I got from walmart for cheap long back.
Oh the cone! looks 3D doesn't it
I uses MS score board. Scored them and sanded - A tip - First score one way and sand and then another and sand. Else it will sand only on one set of lines.  The ice cream I had printed one composite image and one layered.
And to finish the 3D effect I added small foam dots only to the middle and then glue to just the ends so that they give a rounded effect.. Some doodles and pink stamper's stamp and well that's it and here are the pics


November 9, 2010

Cricut Circle Magazine challenge

Wasn't that one awesome card by Beth aka 217.
I usually do not double post a project with my designer but then I needed to enter the circle magazine ornament challenge and didn't want to leave it late until someone comes up with something similar and I have to redo .
It was funny as I did this yesterday as I played with my snow angel  Imagine cartridges which came yesterday evening by post and today I see that Beth has done similar using the same image but in card .
Often times I have told we both think alike and here is proof :)
Cartridge used is just  snow angel . We are supposed to use 4 cuts and atleast one other PC machine - yudu, cuttle or knifty knitter so I chose cuttlebug. The flower and leaf are embossed with paisley and the wreath is disney cutting and embossing folder combo.Stickles and beads and cords and also cartridge blister pack cut to round shape and chipboard all come into play


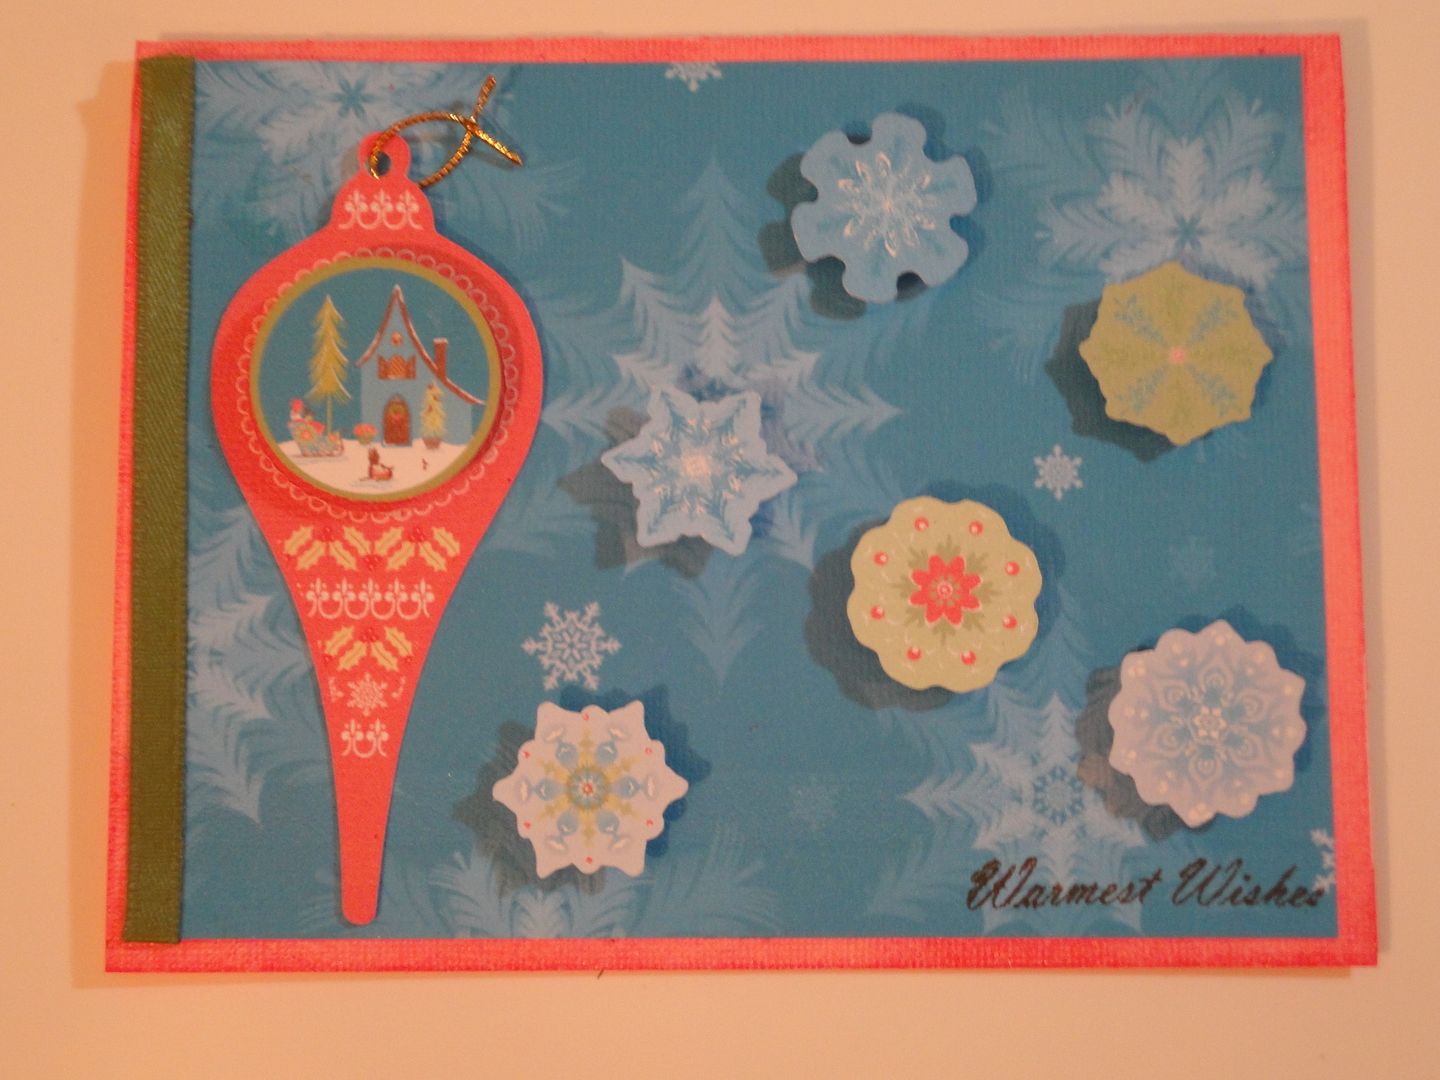
Warmest Wishes Card

Hi everyone! This is Elizabeth from 217 Creations. Thanks Pam for having me over to play! Here in Kansas we are still experiencing a gorgeous autumn, but I can feel the beginning of winter to settle in.  My kids are excited and talking about Santa.  We bought firewood last weekend.  I am looking at my list to get done over the next few weeks before family arrives.  The season is definitely upon us.  But through all the hustle and bustle I need to find time to make cards for family and friends.  This is one of many that I am making "prototypes" for this holiday season.
The paper was printed using my Imagine.  This pattern is a pre-designed pattern from Snow Angel and was printed using a textured white cardstock. I printed at 12x12 and then trimmed a mat for the card at 4 inches by 5.25 inches.  
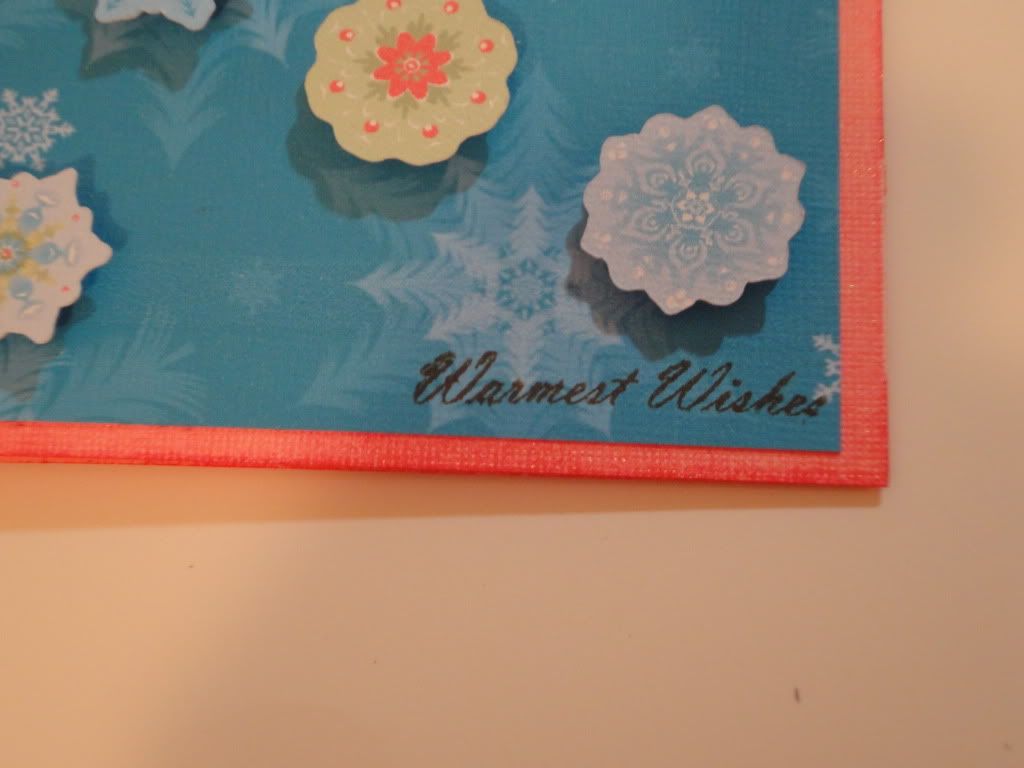
 I stamped the sentiment "Warmest Wishes" from  Pink by Design Stamps Winter Fun in Walnut Stain Distress Ink.  I then wrapped the matting with a sage green ribbon and glued it down.  Then I mounted the matting to base of the card.
 Next I began to assemble the embellishments.  I cut the ornament at 3.5 inches with the layers separated.  The beauty of the Imagine is that each cut on the Imagine cartridges can be either cut all together and flat or cut in separate layers.  For this card I chose to "break" the layers to form the ornament. I popped the top layer off the middle.  I then punched a small (yes and crooked! UGH!) hole in the top of the ornament.  I then tied a gold thin ribbon through the top.
 I really wanted to cut several of the snowflakes on this cartridge.  There are so many varieties that I could not put all of them on my card.  So I chose a few to pull it together. They were cut at .8 inches. I also used pop dots to raise the flakes off the card 
Now that I have made this "model" I know I can easily assemble many of these quickly, yet they look high quality.  I simply love the ornaments on this cartridge.  They remind me of the ornaments my mom and grandma used to always decorate the tree with! They are like little vignettes. I just love the holidays!
 As always thank you for commenting and following or subscribing. Have a great day!