f The Bugbytes

Welcome - Copyright & Disclaimer

We are moving from custom domain back to blogspot. If there are broken links please try adding blogspot.com instead of .com. Welcome to The Bug Bytes - a blog mainly for Papercrafting and some photography and other stuff thrown in here & there. Add in some die cutting machine, scrapbooking tools, cameras, scissors , glue and...... My name is Pam. If you have been redirected from papillondigitaldesign.blogspot.com you have come to the right place.Hope you get inspired by the projects, videos and files. Would love it if you could leave comments and become a follower. (Word verification is turned ON to avoid spam. Sorry for that inconvenience.) Would love it if you would also share your project here . If you find a linky under the post do share your project by posting link there or if you do not find a linky post your link in the comments.Thank you for visiting.

August 19, 2011

IF I CAN MAKE THIS NECKLACE, SO CAN YOU!!!

Hello, everyone!  This is Audrey, back again this month for another project.  Thank you Pam for having me back, I am always happy to be here!

I hope you enjoy today's project as much as I enjoyed making it!  I'm not a jewelry maker, so this may not be perfect or structually correct,  but I am a crafter, so... lol!!!   Besides, I don't think there's any right way or wrong way when you craft -- it's your way!!!  LOL!

Making jewelry is so much fun and this project was really very easy!  Let me get going because this is a picture-heavy tutorial but, before I begin, please note that I did this in somewhat of a hurry without letting glue dry and/or catching up some loose ends.  Of course, after I finished the tutorial, I went back and took my time to clean it up.  If you do this project, you'll take your time on every step!!!  You'll let all the glue dry between each step and tuck in every loose end!!!  Right?!!!   LOL! 

Here's the necklace I made for my DT project today:


Now I'll get started on how I did it.  I began with a piece of cord 24" (2 feet) long (NOTEI added a dab of glue to each end of the cord to keep the twisted ends from separating after cutting the cord and before beginning this project);  a strand of pearls 30" (2.5 feet long), 2 wooden beads, 2 large cord end caps, 2 jump rings, 1 clasp, and a glass dichroic pendant; you'll also need a needle-nose and a flat-nose set of pliers, and E-6000 glue.


Starting with the cord, I evenly folded to double it then added a drop of glue to the connected middle tip-end to keep it together and to avoid it separating while working with it (I did not glue closed the open end of the cord):


Next I taped the glued end of the cord to the table and began loosely but evenly twisting the cord, one end over the other, until I came to the very end of the cord:


Once I got to the end of the cord, I then glued the two ends together to keep them from separating.  This is what I got:


Next, making certain I was working from the very middle (center) of my cord,  I added the glass dichroic pendant onto the cord and slid a wooden bead on each side of the pendant -- making certain it was directly in the middle of the cord:

I then took the strand of pearls and starting from the middle of the strand of pearls I laid them beneath the glass pendant and brought one of each end of the strands of pearls over each of the wooden beads; I applied  a dab of  glue to each pearl on the sides of the beads to secure them in place:


Starting on one side of the pendant, I began to loosely but evenly wrap the pearls around the cord until I got to the end of the cords, then I glued the last pearl to the end of the cord (it's easy if you follow the twist in the cord):


I did the same thing to the other side and this is what I had:


Before going any further, I first held up my necklace with the ends together to make certain it draped properly!  If the cords and pearls would have been too tightly wrapped and didn't drape evenly, I would have unglued the ends to re-wrap the cord and pearls to make sure it draped as evenly as possible.  After I did this I added the end caps to each side of the necklace ends.  To do this I first added glue E-6000 glue to the inside of the caps and taking one cord/pearl end, pushed it into the end of one of the cord end caps (NOTE:  This is where you'll take your time!  You may need to use a skewer to get all the ends tucked in).  When I finished adding both end caps, I had this:


Now the last thing I had to do was add my jump rings and the clasp.  Here, you'll have to pay close attention in the reading because this is a two-hand operation, and I can only use one hand with having to hold the camera and take the picture.  I grabbed and held one side of a jump ring with my  needle-nose plier making sure the end of the jump ring that opens is at the top (facing up); next I took the flat-nose plier to  grasp and hold the other side of the jump ring; once I had each end held, I  very slightly twisted the flat- nose plier gently towards or either away from myself while holding the end of the jump ring held with the needle-nose plier still -- I do not just pull the jump rings open by pulling to each side.  Once opened the jump ring will have one end opened slightly in front of the other  to look like this:


Now I slid the opened jump ring onto the connecting end of the cord end clasp.  To close the jump ring, I did the same thing in opposite to how I opened it; I grabbed one end of the ring with the needle-nose pliers and the other side with the flat, and twisted until the rings connected to close.  If done properly you will feel a slight pressure or a slight snap when the ends of the ring lock in place. When this side was done, I did the other side.  One last step and my necklace was done!

To complete the necklace, I  opened the connecting end of the clasp and secured it to the end of one of the jump rings!!!  That's it -- easy peesy!!!  A pretty handmade necklace:


Your turn!!!  I purchased all my jewelry supplies from either Michael's and/or Hobby Lobby.  However, you can use any old jewelry findings, buttons, coins, etc. and just glue it on!!!   You can even recycle old jewelry for parts like the clasp, jump rings, etc.  You're the designer!!!

That's it for this month!  If you have any questions, please do not hesitate to drop over to my blog by clicking here, or on my name at the top of this post, and leave me a comment.  I'll get back to you as soon as I can.

I hope you like my project today, and thank you so much for stopping by.  Hope you'll join me again next month, and...

I'll be seeing you!

August 18, 2011

Stamps and the Cricut!

Hello there everyone! Amylynne back here from amysscrappyspace.blogspot.com. Last month if you saw my post I did a small tutorial on making stencils with your cricut. Well I am enjoying using my cricut in different ways and thought we would move into making stamps with your cricut! Sound fun? It is! Let's get started.....first you get some of Provocrafts stamp material. You set your cricut on the setting according to the package.....which is blade depth 4.5, speed 3, pressure 4.

Now the really hard part......choosing a design to cut! Lol As you can see by the photo I chose just a few.......


Now you can stamp away and make some projects! I just used a few of what I cut out to make a couple cards.


Love it!! I think I really like the monogram one.....from Tie the Knot cartridge.....yep....I can see making a set of these for a gift! Well any could be a gift! Lol That's it! I hope you enjoyed my brief tutorial on stamping! Thanks Pam for letting me invade your blog! And come see me on my blog at www.amysscrappyspace.blogspot.com cause you never know what I will create next! Have a great day and happy stamping!

Amylynne


August 17, 2011

Baby love

Good morning! This is Beatriz from Amazing Grace bringing you another baby page I created for my grand-baby-to-be in just 13 days! Her name is Madison Rose and she will be born in Las Vegas on August 30th, the Lord willing. This is my first grand-baby so you can imagine how excited and crazy I am!!!!

The stork is from "Wrap it up" cricut cartridge. She is 10" and has three layers.


You can see her better here.


Thank you Pam for having me today and thank you for my beautiful birthday card too! Have a great and blessed day!

August 16, 2011

One of a Kind Card

Hello everyone! Allison from Goody Bag Diva back again  - I have a simple card to share with you today and for once I am not embarrassed by one of my cards.  I made this for a dear friend and I can't wait for her to get it in the mail!

The details: 

I have been dying for Preserves forever and I finally indulged myself in one of the last cricutmachine.com sales. I don't know why I wanted it so badly - this card must have been in my head wanting to get out! Then when I got the K and Company Citrus Bliss paper stack at Joann's I decided it was card destiny! That's a real thing right??

I cut out the grapes with all layers at 4 inches and used papers from my scrap paper stash. I wanted to add some more dimension to all the flat papers so I inked all of the layers before assembling. I was very pleased with how the leaves turned out. A closeup of the bunch:


 For my "one of a kind" grape I cut a circle at 0.70 inches from George and Basic Shapes. I used the layers feature on my Gypsy to figure out what would be the right size. Then I stamped with a Peachy Keen face stamp, added a touch of glossy accents to the eyes and pop-dotted it on the front. The card base from DCWV while the purple background paper as well as the sentiment stickers are from the K & Company Citrus stack.

On the inside I think I am going to add "...is the kind of friend you are!" and pop it in the mail with a little treat.  I hope you can forgive this simple design  and I will try to be fancier next month!

August 15, 2011

Love blogger's new improvements

Love blogger's new improvements. You can add your own favicons. You can now increase the width beyond the measly 800 whicg is so great I like 1000 in the middle and around 230 - 250 on the sidebars. And so cool is adding your own background - just add some random designs in photoshop or paint - keep it under 300 kb  -  1800 x 1600 choose no scroll and voila you have your own unique background!
Love favicon. Google favicon on instructions to make your own and have fun! It may take a day to appear on the address bar. Try clearing cache etc after the next day if it does not appear.
Now if only they add emoticons! in comments forms - blogger will be way cooler!

August 12, 2011

Hi all,

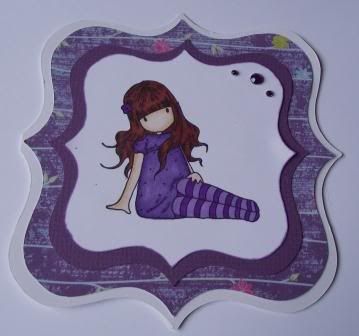
Today I thought I'd share with you a quick card. If you need something that's fairly quick and easy, have a go at this. I used my Expression and Gypsy to make the basic shapes. I used pocket of posies cardstock, bazill basics cardstock, Neenah card and a sugar nellie stamp.


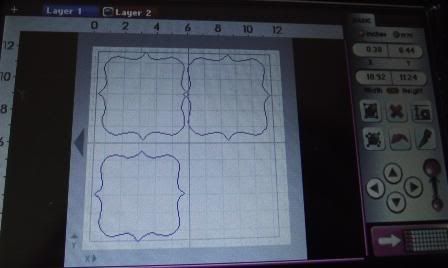
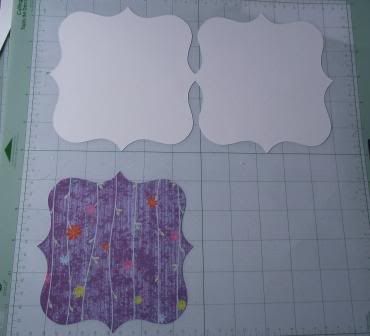
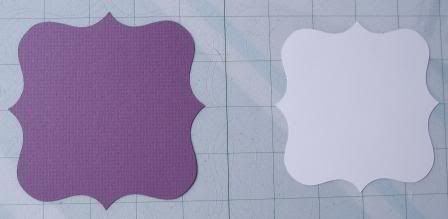
First I made my card shape. Top row. I used the elegant edges cart. I then took a third shape but made it smaller than the card shape as this is going to be the first layer.


On layer two I then took two more shapes, sizing them so they would fit into the above shape and nest inside each other.


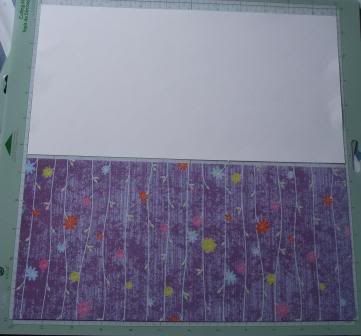
This is how I put my paper on the mat for the first layer on the Gypsy.


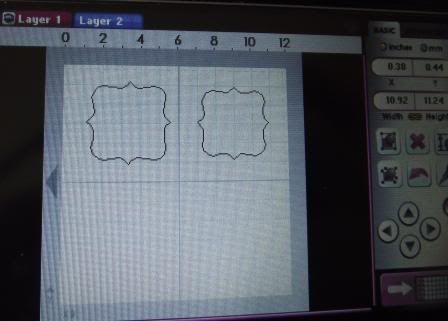
Here are the shapes cut out.


Here is the how I laid the card for the second layer on the Gypsy. You need to make sure the card you want to stamp and colour on is the smallest shape. I used the card I would normally use my promarkers, copics or spectrum noirs on.


Here's the shapes cut out. You then need to assemble the card as you would normally. Stamp and colour your image. I coloured this image in with my Speccies.


Here is the finished card. I think the colouring in of the image took the longest. Also Now I have it as a save file It'll be even quicker to make. The only thing I would change is I would put the two sides of the card closer together.

Thank you to Pam at for having me as a guest designer today.


Kelly x


August 11, 2011

Flower Shoppe Meets Elegant Edges!

Hi Everyone!  It’s Wini from LooneyBugDesigns with your project today.  I have to admit – I did not use my Gypsy on this project – because I just opened these carts and have not had a chance to load them on my Gypsy yet.  That being said…  I am in LOVE with these two carts!   I really like their versatility.  All the different combinations and options… Heaven!! 
Parisian Gilli
I used the new Parisian Gilli and colored her with my Copic markers.  The black frame and purple border are both from the Snowflake image on Elegant Edges (I told you it was versatile didn’t I?).  The Flower was made from the Sunflower1 and Sunflower4 images on Flower Shoppe!  So fun and easy to make!  The green is actually some ribbon from my stash.
Flower Close
You can find more details on my blog.  I would love to know what you think!
Hugs, Wini

August 8, 2011

H20 Fun!!


Hi ~ Lori here from ScrappinMyStressAway with some water fun for my day at TheBugBytes.  I have been working on our last summer vacation pages and I wanted to put a lot of photos into the layouts while not overwhelming the eye.  Hopefully I achieved just that!!


I started by trimming my photos to 4x4, 3 1/2 x 3 1/2 or 3x3.  I made a grid on each page leaving empty space for my title and embellishments.


I made a border with the bubbles from Graphically Speaking.  I took three sets of bubbles at 3.93w x 2.17h and welded them together.  I copied and pasted a second set and then used my Hide Contour to hide all of the inner cuts to make a shadow piece.  I put the H2O (also from Graphically Speaking) on my mat at 4.00w x 2.88h.  I put the word fun from Opposites Attract at a height of 1.35 inches and welded them together.


Here are the cuts.


I cut out the words Jump, Flip and Swim from Street Sign at 1.27 inches.  I chose these words to describe the photos.


I ran the letters through my 1" Xyron and saved the negative piece to use as a template.


I stuck down my letters....


and peeled off the template.


The kids had so much fun jumping into the pool this year.


I decided late to add the three smaller photos on this page so I trimmed them a little smaller than the 4x4 photos (3 1/2 x 3 1/2).  I adhered the title with "fun" overlapping H2O.


I used some twine to divide the page into nine squares.


If you can believe it ~ these were just the top 12 photos!  I take way too many photos!!


I used the same twine to outline my bubbles.

Here is the completed layout once again.  I am forever looking for ways to add lots of photos to a layout ~ especially on vacation layouts!!

Thanks Pam for having me over today!!

August 6, 2011

Crafty Support

Hi scrappers, this is Kate from Sassy and Scrappy and Pam has generously let me post today. Today's post is not the usual crafty fun, but is more of a request for support.

On Saturday the 23 of July, a close friend of mine found out her children's home was on fire. Her twin daughters and their families all live together on Bainbridge Island, WA where their significant others are Coast Guards. In a freak accident their home was gone, and they lost everything. Thankfully everyone was able to get out of the house. Praise God.

My friend, Kymberlee has photos and more of the story on her blog The Paper Midwife.

As you can imagine the loss and fear of what could have happened is overwhelming. Trying to start over and build your life from scratch with 2 small children is difficult, to say the least. So I would like to ask all of you amazing and supportive crafty friends if you could send a card of encouragement to this family. Something that may help lift their spirits as they make their way through this difficult transition.

If you'd like to send cards to the children, Ethan is 4 and Bentley is 18 months.

Cards can be sent to:
Sutton/Durrant Family
Fort Street Fire Donations
321 High School Road NE
Suite D3 #232
Bainbridge Island, WA 98110

Any, and all support for this family is appreciated! Thank you.

August 5, 2011

Celebrate with a Bouquet

Hi
The project for today is a card I call celebrate with bouquet. The image is a bouquet from dover greetings and the sentiment is celebrate. The whole card was cut with silhouette machine. This is such a lovely die cut machine especially for print and cut. It cuts only 8 1/2 x 11 papers though. Just wish they would come up with a 12 x 12 one. I use this machine rather than my knk machine for print and cut as this has an optical sensor which makes it so easy to print and cut as when you send the design to the printer with registration marks (it has 3 registration marks) it cuts so well  even if it cuts only size upto 8 1/2 x 11 but this will do most of the times as anyway most printers unless it is large format only prints this size max. (KNK machine and black cat machines have laser sensor which also works great but takes just a little more time as you have to to align the marks yourself using the laser)

I have used silhouette as it is easier but you can use your printer to print the dover image or any other image you like and any die cut machine and adapt for this card. For e.g you can just use any cardstock instead of printing one and use scallop design from one of cricut cartridge and use your DS or gypsy or craftroom for adjusting width and height and also maybe a different font. I just used the silhouette and for the image the lovely one form dover greetings book. I just love this book for card making. If you want to layer the butterfly and the bee as I have done then you have to print 2 and use your scissors if you don't have silhouette but I did lots of node editing and cropping to get the machine to cut.

Here is a screenshot of the silhouette studio file . I opened up 3 versions of the file so that I can fit and move images in the active cut area. Else you have to print and then cut it immediately and then send another to print and so on. If you open multiple windows then you print each in one shot and then make sure you open the right window for each and send to silhouette to detect and cut ( very important else you will have wrong cuts).


I cut all except for envelope base using the white cardstock (the walmart ones are so great for this) . Then I assembled the card using pop dart and glue(ATG gun)and glue dots. I used 2 flower eyelets which I luckily had in same blue color as the background paper for inside of the card on the sentiment . Once can always enhance the lighter colors with copic or embossing but in this case I didn't have to do that.

Here is the card and envelope


I have added stickles - fruit punch and diamond as I love glitter. I stacked the bee with one layer of pop dots while the butterfly has 2 layers to raise it up further.


I added some doodling with black markers too on the card and envelope.
The inside of the card with the 2 flower eyelets on the label . I further added bling to the eyelets.


So here's the card and envelope once again


Hope you enjoyed the project. You will see more as I keep playing with dover book and silhouette machine. They sing such a great Duet together!

post signature